Datasheet: Blender
|
|
Model: SG 500 |
|
Model: SG 1500 |
|
Model: SG 2500 |
|

|
|
Description & Use
|
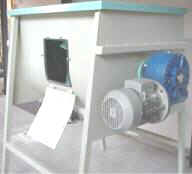
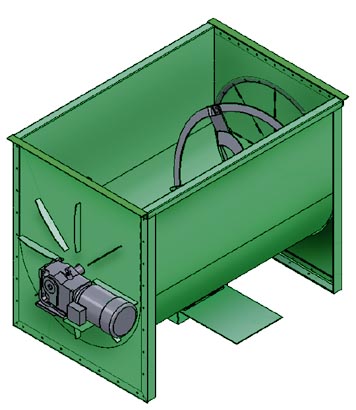
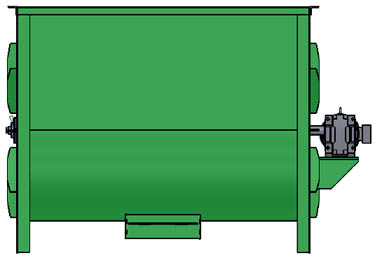
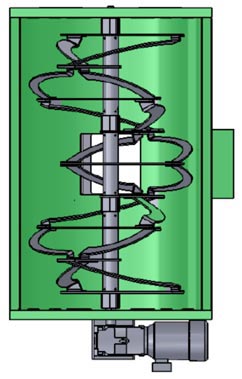
Multi-purpose horizontal blenders for all dry materials. In sizes ranging from 500 lt to 1500 lt to 2500 lt contents. Blenders may be paddle-type or Ribbon-type. For SG1500 and SG2500 blenders as well as some SG500 blenders in-line gearboxes with chain and sprocket drive is may be used or in standard execution angled worm gearboxes. |
|
Motor size |
4kW to 15 kW |
| Rpm | 1450 RPM |
| Gearbox | 30:1 |
|
Alternative in-line gearbox with chain drive |
|
3 Phase 380V, 50 Hz
Dimension & Mass
|
Length |
1730mm |
|
Width |
1320mm |
|
Height |
1650mm |
| Mass | 250kg |
|
Capacity |
550 lt |
Shipping Dimension
|
Length |
1320mm |
|
Width |
1730mm |
| Height | 1650mm |
|
Diameter of bowl |
750 mm |
Size of Discharge Outlet -Bottom(optional) or Side (Standard) |
300 x 300mm Diameter |
| Inspection /Cleaning hatch on side of blender | 350H x 330 wide. Optional extra |
| Adjustable paddles in blender for optimal blending | |
| Standard flat lid. Optional loading openings in lid to be advised by customer. |
Spare parts & Consumables
|
Product Name |
|
Gearbox oil |
|
Seals on shaft |
|
Paddles |
|
Material |
|
Mild steel – standard – food grade epoxy powder coated. |
|
BLENDER OPERATION AND SETTING: |
|
Caution: Never start any blender under full load. Start blender while loading. Make VERY sure that no foreign objects or matter is inside blender and that the blender inspection hatch is closed and no persons are working inside or near the working parts. Never wear loose clothing near working machinery Before starting: Ensure no foreign matter is in blender by checking inside through opening inspection hatch. Ensure blender paddles are set correctly (see "Setting of Paddles" below) and properly tightened. Ensure lid is in place when loading to avoid dust and spillage and injury. Ensure inspection hatch is properly closed with all wing nuts supplied. Ensure outlet valve is closed before starting. Ensure all persons and their limbs are well clear of the blender's operational parts. Ensure the gearbox is filled with appropriate gearbox oil. Check with your lubricant supplier. Ensure motor / gearbox couplings are tight. Ensure tension arm of gearbox is fixed and tight. Ensure all bearings are properly greased. While bearings are never in direct contact with material blended, an approved food grade grease should be used. Start blender, ensure emergency stop is within reach of the operator. Load the product. The Blender capacity is 500 litres. The density of the product to be blended shall determine the maximum kilograms to be blended. On flour / maize meal, this is approximately 400 kg. For critical blending, blend for at least 10 minutes even though the mix should be evenly blended within 3-5 minutes. Do not stop blender when discharging. Continue running the blender until the complete batch is discharged. If the second batch is ready to be loaded, the blender need not be stopped at all and continue rotating while the second batch is loaded. |
|
ADJUSTMENT OF BLENDER |
|
Make sure the blender power supply is off and then disconnected from the electrical power socket before attempting any adjustment. Remove motor from gearbox by loosening the flange coupling. Ensure the wire connection of the motor has sufficient play to allow the motor to be placed on the floor. Remove gearbox and key from the blender shaft by loosening the M24 bolts. Rotate the shaft by hand. Through the inspection hatch at the side of the blender, loosen one paddle at a time and rotate it around its axis and move it outwards towards the blender side to where it clear 5mm minimum for one full rotation of the shaft at all sides of the blender. Ensure paddles feed towards the blender outlet. Repeat for all paddles. Tighten the paddles properly after this procedure Reinstall the gearbox and key. Use a soft hammer to insert the key. When the key does not move freely it must be repaired to fit properly. Forcing the key may damage the gearbox. Reinstall the electric motor. Open the connection box and ensure the wires are properly inserted and tightened and the box is free of dust. Ensure the connection box seal and wire seal and is replaced properly. Tighten the motor and gearbox coupling properly and ensure all bolts are used. |
Technical specifications may be altered without notice. All capacities
shown are indicative only